Nuxt框架中内置组件详解及使用指南(五)


扫描二维码关注或者微信搜一搜:编程智域 前端至全栈交流与成长
Nuxt 中<NuxtErrorBoundary>组件的使用指南与示例
Nuxt 提供了一个
安装与配置
首先,确保你已经安装了Nuxt.js,并且你的项目中已经启用了Nuxt Image模块。这通常在项目创建时自动完成,如果没有,你可以按照以下步骤操作:
npx nuxi@latest module add image
基本用法
组件可以直接替代原生标签,并输出一个原生的img标签,没有任何包装器。以下是如何使用它的基本示例:
<template>
  <NuxtImg src="/path/to/image.png" />
</template>
这将创建一个指向/path/to/image.png的img标签。
属性详解
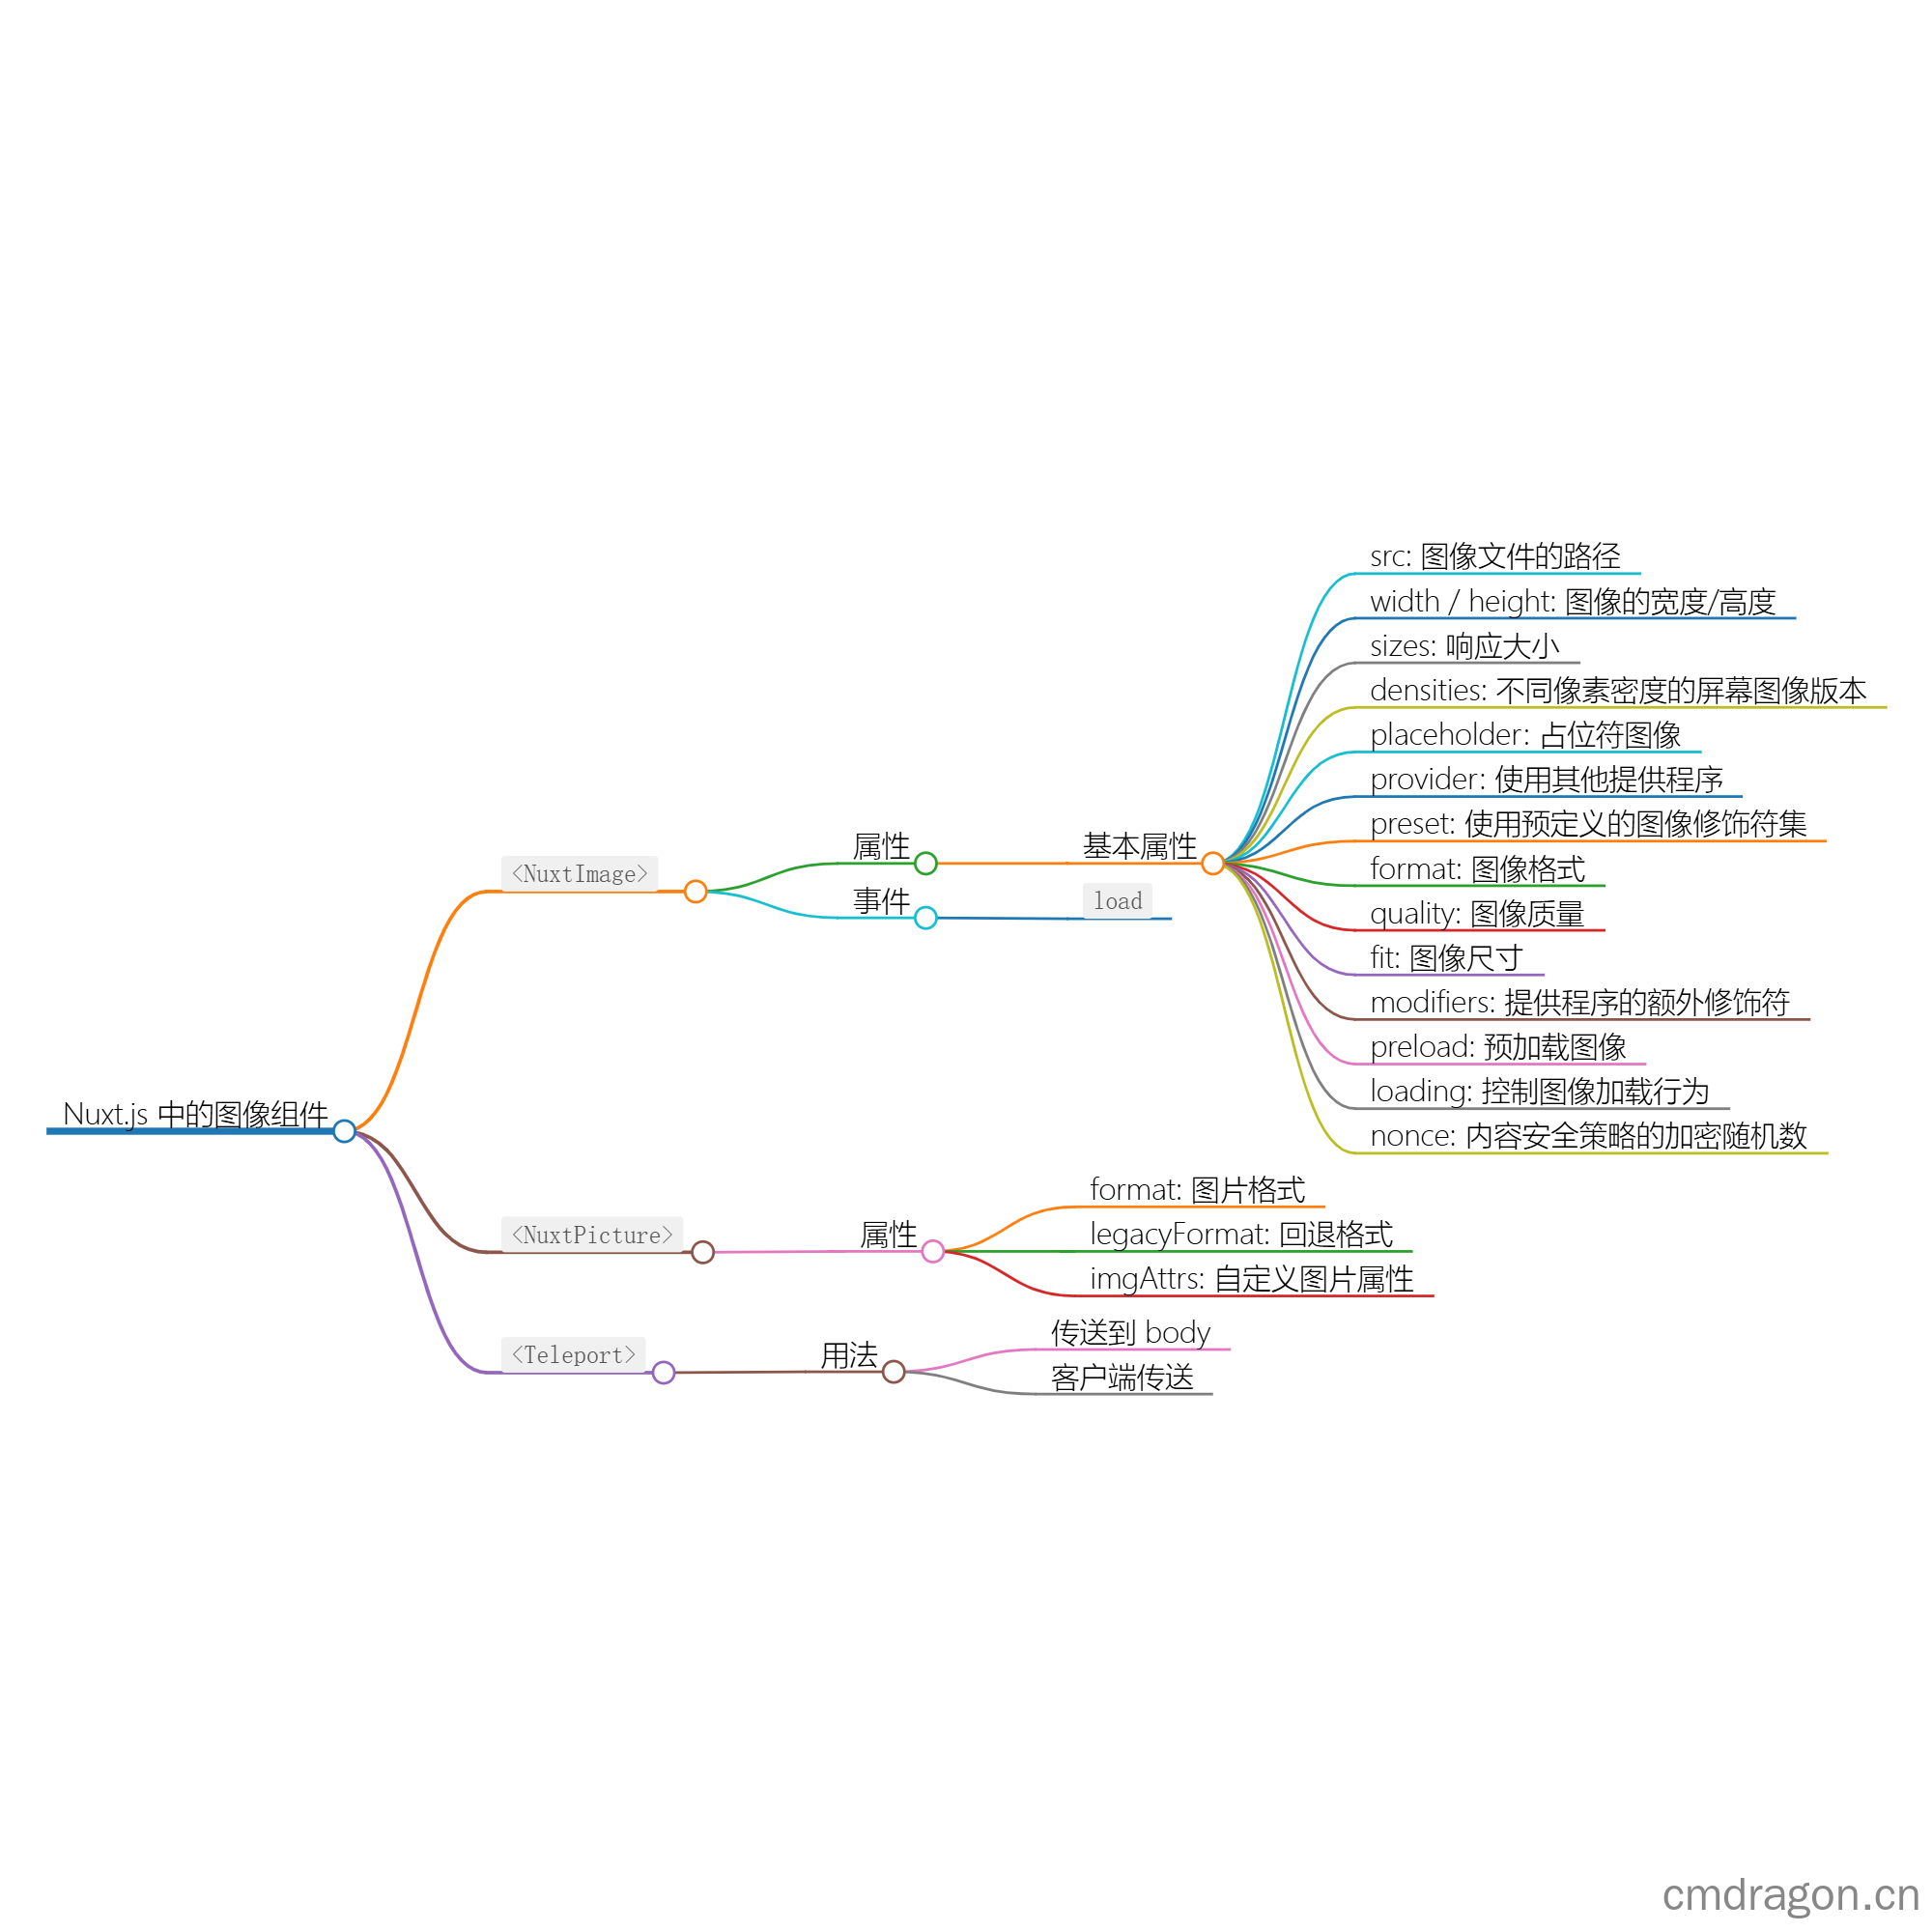
以下是一些主要的属性及其用法:
src: 图像文件的路径。应采用目录中静态图像的绝对路径形式。
<NuxtImg src="/path/to/image.png" />width / height: 指定图像的宽度/高度。
<NuxtImg src="/path/to/image.png" width="200" height="200" />sizes: 指定响应大小。
<NuxtImg src="/path/to/image.png" sizes="sm:200px md:400px lg:600px" />densities: 为不同像素密度的屏幕生成特殊图像版本。
<NuxtImg src="/path/to/image.png" densities="x1 x2" />placeholder: 在实际图像完全加载之前显示占位符图像。
<NuxtImg src="/path/to/image.png" placeholder="./placeholder.png" />provider: 使用其他提供程序而不是默认提供程序。
<NuxtImg provider="cloudinary" src="/remote/image.png" />preset: 使用预定义的图像修饰符集。
<NuxtImg preset="cover" src="/path/to/image.png" />format: 指定图像的格式。
<NuxtImg format="webp" src="/path/to/image.png" />quality: 生成图像的质量。
<NuxtImg src="/path/to/image.jpg" quality="80" />fit: 指定图像的尺寸。
<NuxtImg fit="cover" src="/path/to/image.png" />modifiers: 使用提供程序的额外修饰符。
<NuxtImg src="/path/to/image.png" modifiers="{ roundCorner: '0:100' }" />preload: 预加载图像。
<NuxtImg preload src="/path/to/image.png" />loading: 控制图像的加载行为。
<NuxtImg src="/path/to/image.png" loading="lazy" />nonce: 用于内容安全策略的加密随机数。
<NuxtImg src="/path/to/image.png" :nonce="nonce" />
示例
以下是一个使用组件的完整示例,展示了如何结合使用多个属性:
<template>
  <NuxtImg
    src="/path/to/image.png"
    width="200"
    height="200"
    sizes="sm:100px md:200px lg:400px"
    placeholder="./placeholder.png"
    provider="cloudinary"
    preset="cover"
    format="webp"
    quality="80"
    fit="cover"
    modifiers="{ roundCorner: '0:100' }"
    preload
    loading="lazy"
    :nonce="nonce"
  />
</template>
在这个示例中,我们使用了多个属性来优化和展示图像。
事件
组件支持原生事件,你可以通过监听这些事件来执行特定的操作。例如:
<template>
  <NuxtImg
    src="/path/to/image.png"
    @load="handleImageLoad"
  />
</template>

<script setup>
function handleImageLoad(event) {
  console.log('Image has been loaded!', event);
}
</script>
在这个示例中,当图像加载完成时,handleImageLoad函数将被调用。
Nuxt 3 中<NuxtPicture>组件的使用指南与示例
引入组件
在 Nuxt.js 项目中,您可以直接在页面或组件中引入 <NuxtPicture> 和 <NuxtImg> 组件。
import { NuxtPicture, NuxtImg } from '#components';
示例代码
下面是一个简单的示例,展示如何使用 Nuxt Picture 组件为同一图片提供多种格式:
<template>
  <NuxtPicture
    format="avif,webp,jpeg"
    src="/nuxt-icon.png"
    alt="Nuxt.js 图标"
  >
    <NuxtImg
      format="avif"
      src="/nuxt-icon.avif"
      alt="Nuxt.js 图标"
    />
    <NuxtImg
      format="webp"
      src="/nuxt-icon.webp"
      alt="Nuxt.js 图标"
    />
    <NuxtImg
      format="jpeg"
      src="/nuxt-icon.jpeg"
      alt="Nuxt.js 图标"
    />
  </NuxtPicture>
</template>
解释
format: 指定图片的格式,多个格式用逗号分隔。在上面的示例中,我们提供了 AVIF、WebP 和 JPEG 三种格式。src: 指定原始图片的路径。alt: 提供图片的替代文本,用于屏幕阅读器等辅助设备。
高级配置
设置回退格式
您可以使用 legacyFormat 属性来指定回退格式。默认情况下,如果原始格式支持透明度(如 PNG 和 GIF),则回退到 PNG;否则回退到 JPEG。
<NuxtPicture
  format="avif,webp"
  src="/nuxt-icon.png"
  legacyFormat="png"
  alt="Nuxt.js 图标"
>
  <!-- 图片源 -->
</NuxtPicture>
自定义图片属性
使用 imgAttrs 属性,您可以在 <NuxtImg> 元素上设置其他 HTML 属性。
<NuxtPicture
  src="/nuxt-icon.png"
  alt="Nuxt.js 图标"
>
  <NuxtImg
    format="avif"
    src="/nuxt-icon.avif"
    alt="Nuxt.js 图标"
    v-bind="imgAttrs"
  />
</NuxtPicture>

<script>
export default {
  data() {
    return {
      imgAttrs: {
        id: 'my-id',
        class: 'my-class',
        style: 'display: block',
        'data-my-data': 'my-value'
      }
    };
  }
};
</script>
Nuxt 3 中<Teleport>组件的使用指南与示例
<Teleport> 组件可以将它的子组件内容渲染到 DOM 的任何位置,而不是紧跟在它的父组件下面。这使得我们能够将模态框、侧边栏等元素放置在页面的任何位置,而不影响其他内容的布局。
基本用法
1. 传送到 body
通常情况下,我们可能会将模态框等元素传送到 body,这样它们就不会被其他内容遮挡。
以下是一个简单的示例:
1 | <template> |
在这个例子中,当点击按钮时,模态框会出现在页面的中心位置。
2. 客户端传送
如果你需要将内容传送到一个特定的元素,比如一个特定的 ID,你需要使用 <ClientOnly> 包装器来确保 <Teleport> 在客户端渲染时才被处理。
以下是一个客户端传送的示例:
1 | <template> |
确保你的 HTML 中有一个具有 ID modal-container 的元素:
1 | <div id="modal-container"></div> |
往期文章归档:
- Nuxt框架中内置组件详解及使用指南(四) | cmdragon’s Blog
- Nuxt框架中内置组件详解及使用指南(三) | cmdragon’s Blog
- Nuxt框架中内置组件详解及使用指南(二) | cmdragon’s Blog
- Nuxt框架中内置组件详解及使用指南(一) | cmdragon’s Blog
- Nuxt3 的生命周期和钩子函数(十一) | cmdragon’s Blog
- Nuxt3 的生命周期和钩子函数(十) | cmdragon’s Blog
- Nuxt3 的生命周期和钩子函数(九) | cmdragon’s Blog
- Nuxt3 的生命周期和钩子函数(八) | cmdragon’s Blog
- Nuxt3 的生命周期和钩子函数(七) | cmdragon’s Blog
- Nuxt3 的生命周期和钩子函数(六) | cmdragon’s Blog
- Nuxt3 的生命周期和钩子函数(五) | cmdragon’s Blog
- Nuxt3 的生命周期和钩子函数(四) | cmdragon’s Blog
- Nuxt3 的生命周期和钩子函数(三) | cmdragon’s Blog
- Nuxt3 的生命周期和钩子函数(二) | cmdragon’s Blog
